DotNetNuke Hosting with ASPHostPortal.com

BLOG about DotNetNuke CMS, latest technology and Special DotNetNuke Hosting Package with ASPHostPortal.com

DotNetNuke 7.3 Hosting with ASPHostPortal.com :: DNN Spam Registrations

clock November 11, 2014 08:14 by author Mark

Introduction

Recently there has been a lot of discussion in the community around DNN Spam registrations and methods and processes to prevent or fix the issues that are associated with them.  I've been debating on if/when I should actually write about this given that there is an Official DNN Software response on the issue, as well as many other community comments.  Well, when I had a server go down and guess what it was because of this very issue so I think its time to give my quick perspective and recommended action points for those of you that are running a DNN site.  These recommendations apply for ALL DNN versions!

Update Registration Mode Setting

If possible, set your registration mode to "none" if you don't need public registration.  This is a great first defense.  If this isn't possible, then go with the next best step and that is to create a custom registration page.  If you do this, though make sure that you follow the instructions in the next step.

Optional: Add IIS Request Filtering

One of the recommended "stop gap" items that DNN Corporation recommends for those that cannot set registration to "none" is to set a filter in IIS for request filtering.  I STRONGLY recommend this solution and am rolling this out to ALL DNN sites that I manage or have any control over that need to allow user registration.  This will prevent the most basic backdoor used by these scripters which should at least help limit things a bit.

Post Change Investigation & Resolution

This is the key, the above changes are quick & easy, but it is the investigation that is key.  I'm writing this post because of the investigation and resolution that I had to do tonight while on vacation.  I had a server that went down, with a clients database that grew from 45mb to almost 1gb in 7 days, had a user count grow from 2 users to 197,000 users in that same 7 day period.  All of this happened silently, without stressing server resources, without setting off any DDOS alerts or anything.  How did it become an issue today?  The site owner tried to make a change and then it fell on its face.

So, given that this can be a silent threat to your site, what do you need to look for, and what actions can you take to fix?  Lets look at these next.

Do you have impacted Users?

If you are lucky, your site will not have any impacted users and you can stop here.  However, if you go to "Admin" -> "User Accounts" and see that you have 50,000 users when you should only have 10 you have some work to do.  This is the fastest way to look at things and identify what is going on.  If you have rogue users you will need to do two things to truly 'clean' your installation from these user accounts.

Delete the User Accounts

The first step in resolution is to get rid of the users that are impacting the site.  How you accomplish this is going to vary a bit.  If you have 5, 10, 20 SPAM users, just manually use the DNN delete features, but make sure to note the User Id value for each user.  If you have a lot of users, for example in my case more than 100K users to remove, you are going to want to investigate a scripting solution.

I will not post direct SQL here as you NEED to be a user with proper SQL knowledge to do this, but you can do this VERY fast and very clean within DNN.  Simply set all of the users that you need to remove to "Deleted" in the database, then use the "Remove Deleted Users."  Now, this process of having DNN remove the users might need to be repeated as there is a 30 second timeout on DNN database queries.  In my case it took 10 attempts to remove all.

Delete the Folders & Re-Sync Files/Folders

This is one area that is not often remembered by administrators with fake accounts.  Each user that is created in more current versions of DNN have a folder created for them inside of the users folder within DNN.  You will want ot go in and delete all of these folders from the filesystem.  Then once that is completed you will want to go to "Admin" -> "File Manager" and sync the filesystem.  This is imperative as more entries in the folders and permissions table will slow down areas of the site that interact with these tables.

Conclusion

We need to see what the final fix is for this issue, but in the meantime we need to be vigilant and keep our own sites as protected as possible.  Given the nature of this issue I am being a bit vague in recommendations as the exact solution isn't going to be the same for all users and sites.


DotNetNuke 7.3 Hosting with ASPHostPortal.com :: New Google Maps Integration with DotNetNuke 7.3

clock November 11, 2014 05:23 by author Ben

Now you'll be able to add Google maps to posts. Post might have the primary post map, and with tokens you'll be able to include a limiteless quantity of maps to content articles. Maps may be very easily created and edited by way of the in-built Map editor.

Within this blog I'll clarify How you can insert new google maps into DotNetNuke 7.3. Google has up-to-date Google maps to new UI and features.

So will start with Google maps very first.

Click the Google applications on right top facet of one's browser. Open up Google maps appplication.

You will be landed to New Google maps. Type your address or location in the search box. For instance i have added Madame Tussaud Newyork.

Once your location is targeted on google maps.Click on setting at the right bottom side of the map and select share and embed maps.

A modal popup will look on the display with Share hyperlink and Embed map alternative. By this you are able to possess the link in the map to provide to any hyperlinks if required else we can select to embed the map into your site or application. Also you'll be able to shorten the URL if necessary .

Given that we need to embed google maps into DNN we are going to choose Embed maps alternative. After you click on embed maps option you'll have a smaller sized see of maps you've selected i.e in my scenario Madame Tussauds The big apple with ratings, reviews, bigger map choice and obtain directions. You can even bookmark if necessary.

OK once you have got map on Embed maps. Now you can choose the size of the map required based on your requirement. Google offers small, medium, large and custom size.

We can change the size of the maps by using custom size.Google maps also provides option to preview your custom size by clicking on preview option.A new window will be popped out for preview.

For now we will be using Medium as our map size. Will select medium size and copy the iframe provided.

Once iframe is copied will now login to our DNN (DotnetNuke). Add username and password and login to DNN.

Once DNN is logged in. To place our Google maps on our site we need to add a HTML module to our site. This can be added  by navigating to Modules > Add New Module > Selecting Common from the Drop down.

Once common option is selected from drop down options will be narrowed to HTML. Drag the HTML module to your selected pane in my case i am adding module to Content Panel.

Now we have added HTML module to our Content panel. We need to edit content inside our HTML module. This can be completed by clicking on pencil icon existing on the HTML module. In the event you dont have pencil icon navigate to Edit page choice on proper leading corner in the DNN control panel. After pencil icon is clicked click on on edit content.

Once you select Edit Content. A modal popup will appear with all editing option. Initally the editr will be in Design mode change the mode to HTML. This can done just by clicking on HTML option just below the editor.

Once you selected HTML mode. Paste the iframe we copied from Google maps to the HTML editor in DNN. After pasting the iframe to DNN editor save the module by clicking on save button.

Thats it Google maps will be embeded on your DNN page in a following way.

Hope you liked my tutorial.


DotNetNuke 7.3 Hosting - ASPHostPortal.com to Launch New Data Center in Paris

clock November 10, 2014 10:46 by author Kenny

ASPHostPortal.com to Launch New Data Center in Paris, France on November 2014

ASPHostPortal is known for credible and unswerving web hosting solutions. Apart from the reliability of the ASPHostPortal Uptime, which features 99.9 per cent average uptime, ASPHostPortal also offers outstanding data center which reflects ASPHostPortal high speed and high performance hosting package.  Recently, ASPHostPortal.com launch its new data center in Paris, France on 9th November 2014 with room for more than 10,000 physical servers, and allowing customers’ to meet their France data residency requirements.

The new facility will provide customers and their end users with ASPHostPortal.com services that meet in-country data residency requirements. It will also complement the existing ASPHostPortal.com Amsterdam data center and London data center, to provide European customers redundancy options within the region. The Paris data center will offer the full range of ASPHostPortal.com web hosting infrastructure services, including bare metal servers, virtual servers, storage and networking.

ASPHostPortal offers the perfect combination of affordability and reliability.  They have an excellent uptime history with several months this year boasting more than 99.9% average uptime.  Their hosting package reflects speed and performance.  Their data center can take much of the credit for such superb services. The new data center will allow customers to replicate or integrate data between Paris, London and Amsterdam data centers with high transfer speeds and unmetered bandwidth (at no charge) between facilities.

“With ASPHostPortal, choosing the data center location is a free feature and option to all customers. The customer simply chooses US, Europe, Asia or Australia. It's simple, intuitive and convenient. The option is free, and there will never be any other cost to the user associated with this option,” said Dean Thomas, Manager at ASPHostPortal.co

Clients who have any questions about the feature and the option that is most suitable for their purposes should feel free to contact ASPHostPortal through their 24/7/365 customer support team. ASPHostPortal will help you choose the right option that will best suit your needs.

For more information about new data center in France, please visit http://asphostportal.com/Hosting-Data-Center-France.

About ASPHostPortal.com:

ASPHostPortal.com is a hosting company that best support in Windows and ASP.NET-based hosting. Services include shared hosting, reseller hosting, and SharePoint hosting, with specialty in ASP.NET, SQL Server, and architecting highly scalable solutions. As a leading small to mid-sized business web hosting provider, ASPHostPortal.com strive to offer the most technologically advanced hosting solutions available to all customers across the world. Security, reliability, and performance are at the core of hosting operations to ensure each site and/or application hosted is highly secured and performs at optimum level.


DotNetNuke 7.3 Hosting with ASPHostPortal.com :: How Using WebMatrix to build a DotNetNuke Application

clock November 7, 2014 10:56 by author Mark

DotNetNuke is a widely adopted open source platform for building web sites and web applications with a Content Management System build on .NET. WebMatrix is a free tool that allows you to create, customize, and publish webpages. It gives a number of different ways that you can create websites. One of the features is providing existing open sources applications such as DotNetNuke, as well as WordPress, Joomla, DotNetNuke or Umbraco. In this tutorial, you will see how quick and easy it is to get your DotNetNuke application up and running! And show how to install, configure and publish a DotNetNuke application with WebMatrix.
If you do not already have WebMatrix, it can be downloaded for free at www.microsoft.com/web/webmatrix.
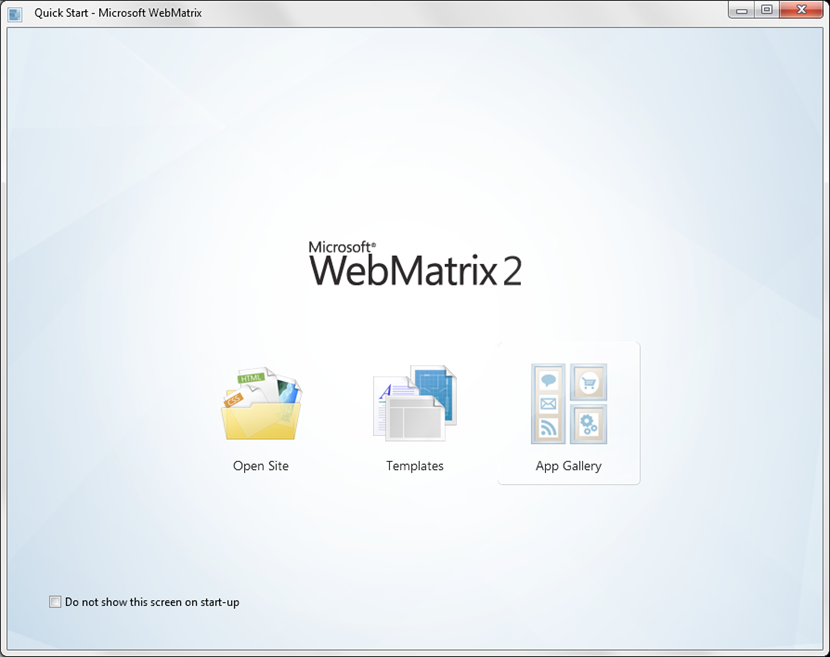
When you launch WebMatrix you will see several options on how to create a new application. To create a DotNetNuke application, select “App Gallery.”
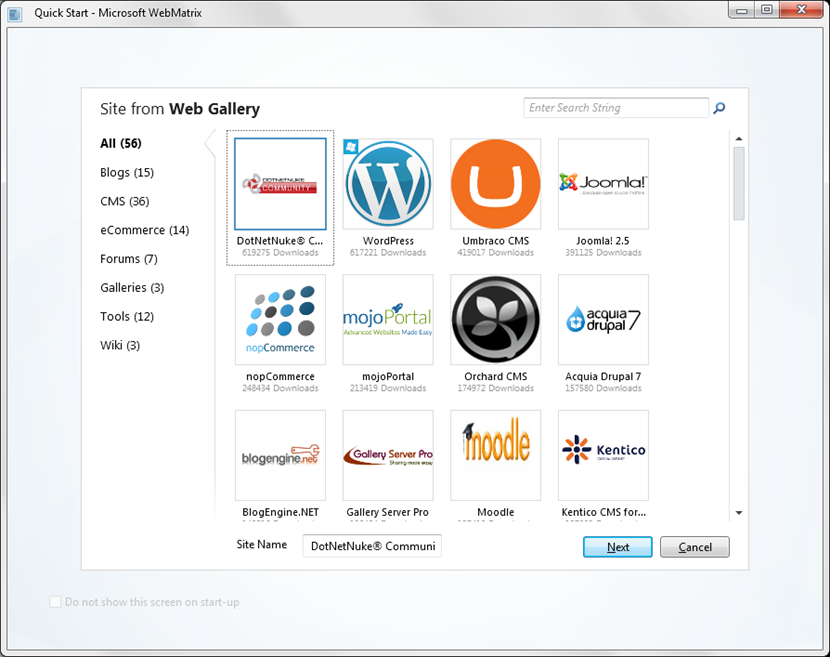
We will now choose the “DotNetNuke Community Edition” icon to install the application. You can give your application a name or keep the default name.
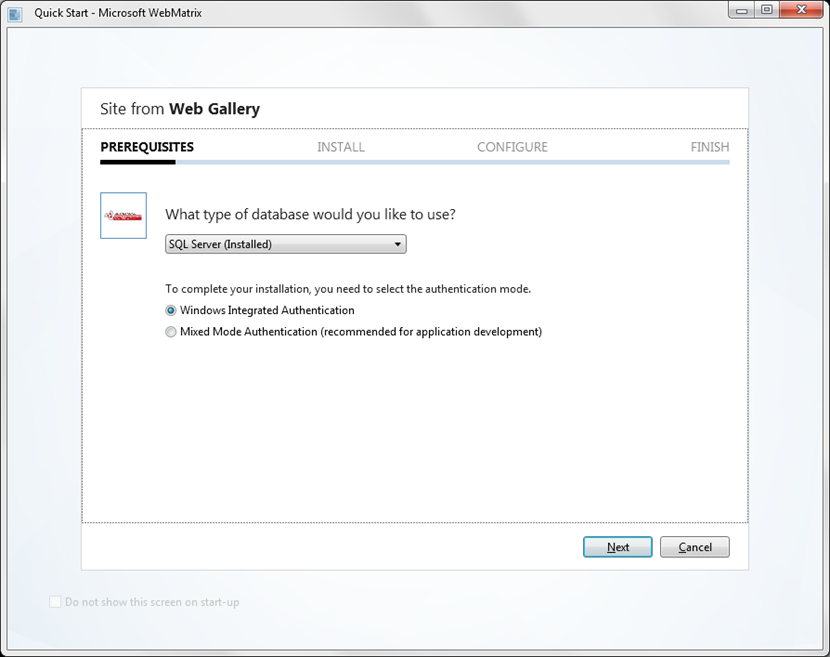
You will be prompted to select a database. Select “SQL Server” and make sure the “Windows Integrated Authentication” radio button is selected and click Next.
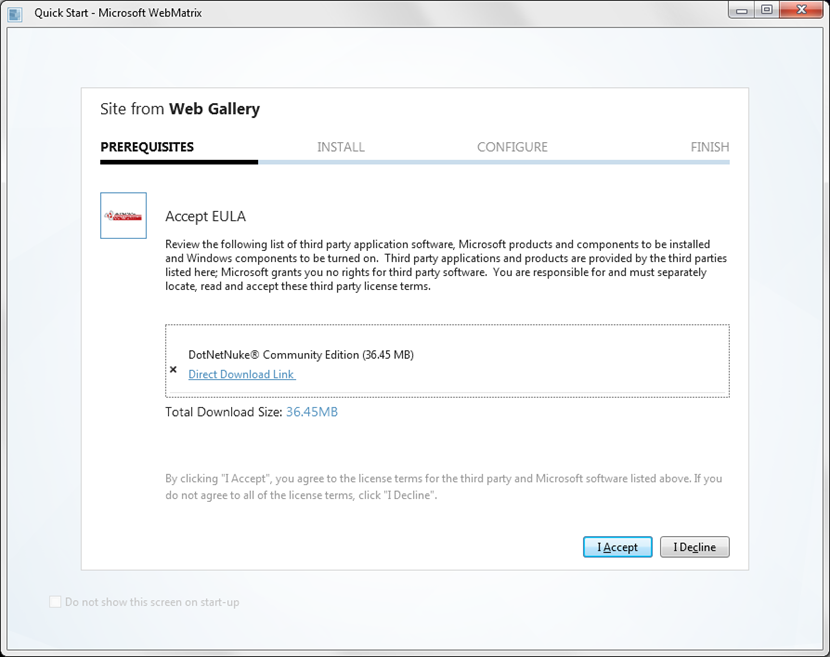
You will be prompted to install DotNetNuke. To do this you must click the “I Accept” button.
Now we wait while DotNetNuke is installed. This make take up to a couple minutes.
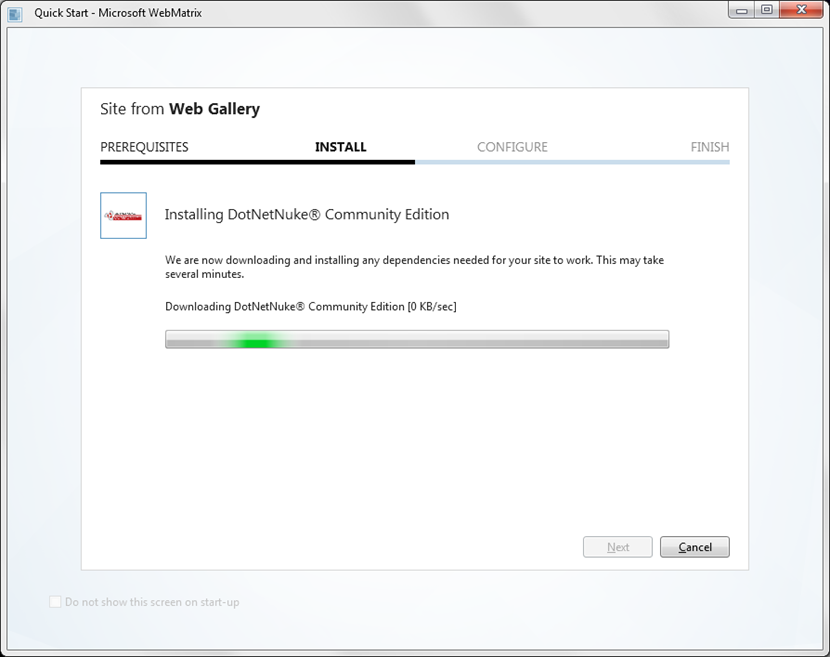
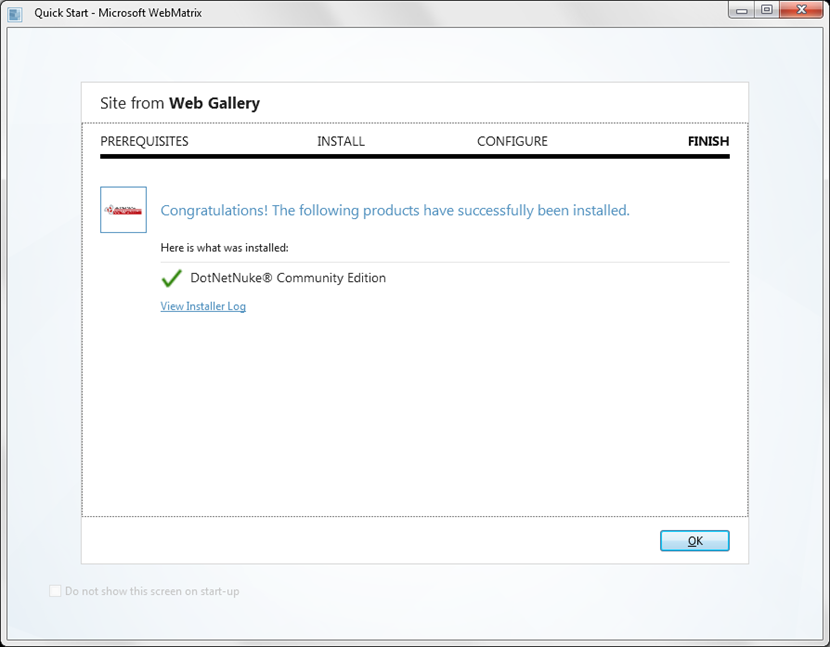
Once the installation is complete we will get a confirmation.
Clicking the “OK” button will take us to our WebMatrix workspace with the DotNetNuke application loaded.
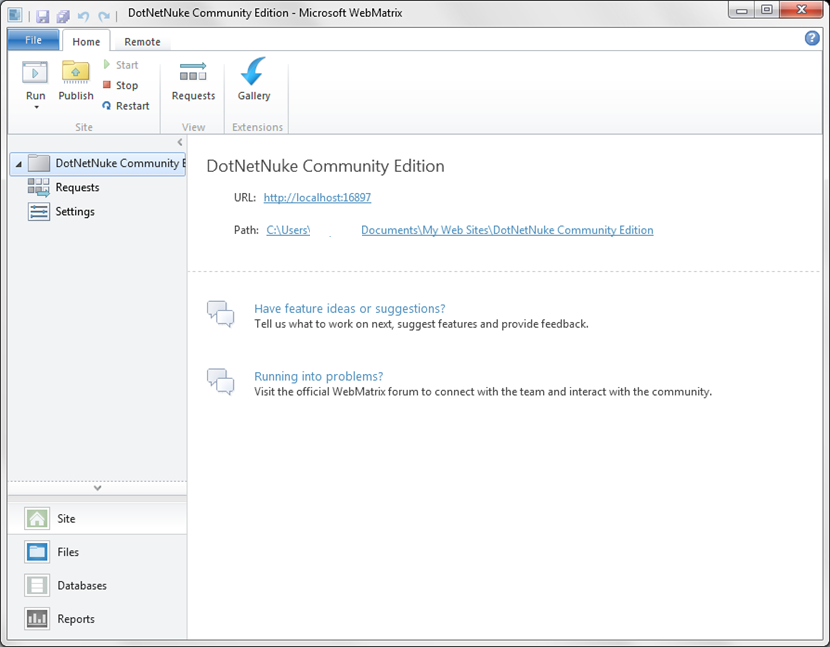
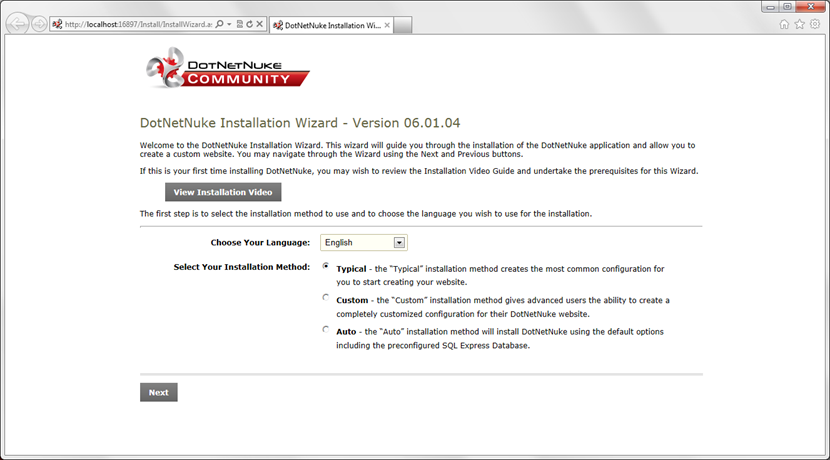
To configure our DotNetNuke application, we will use the Installation Wizard. To run our installation wizard, click the “Run” button on the Menu Ribbon. Note: make sure you run the root folder of the application. Running our application will open the DotNetNuke Installation Wizard. Here we will have three different options for installation: custom, typical and auto. For this article, we will use the typical installation.
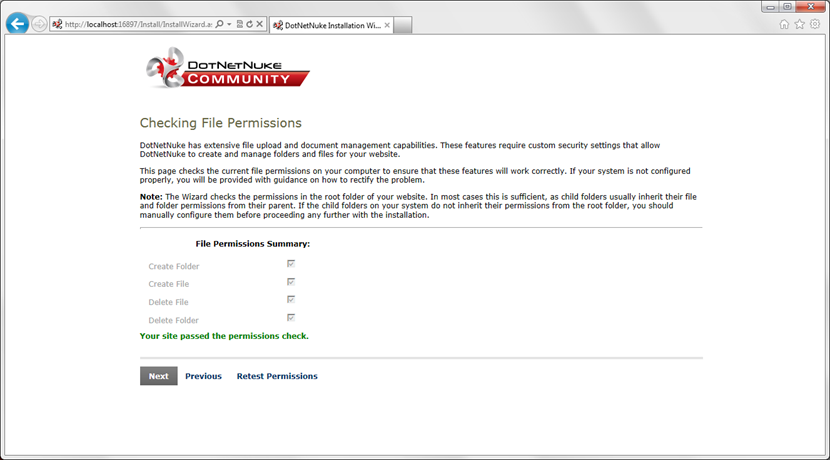
To successfully install our DotNetNuke application, we must first pass a permissions check. The installation wizard will notify you if you passed the check or not.
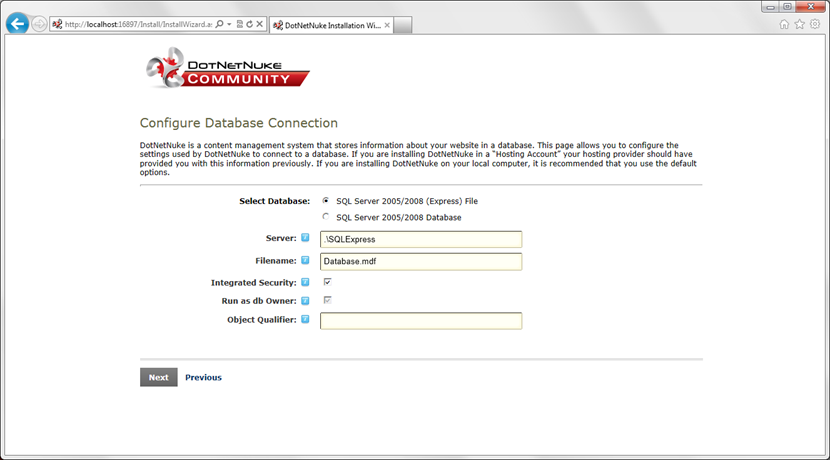
After we pass the permissions check, we must enter our database information. In this example we’ll use a SQL Server 2005/2008 (Express) File.
Once the database connection is created, the installation wizard will install the database for you. The installation of the database can take quite a few minutes.
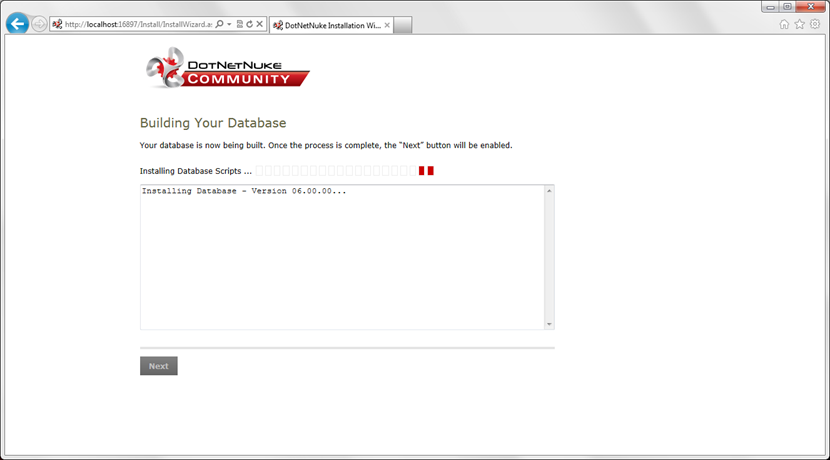
Once the database installation is complete, a confirmation message will appear at the bottom of the window. The “next” button will once again be enabled. We must click “next” in order to continue with the installation wizard.

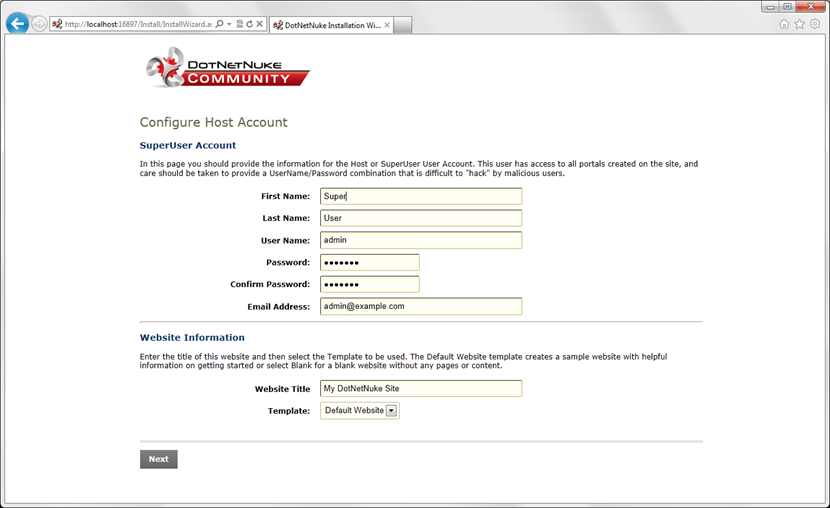
We now will have to create a Host account. Fill in the form and hit the “next” button. It is a good idea to write this information down.
Once your installation is complete you will be able to access your portal and log in.
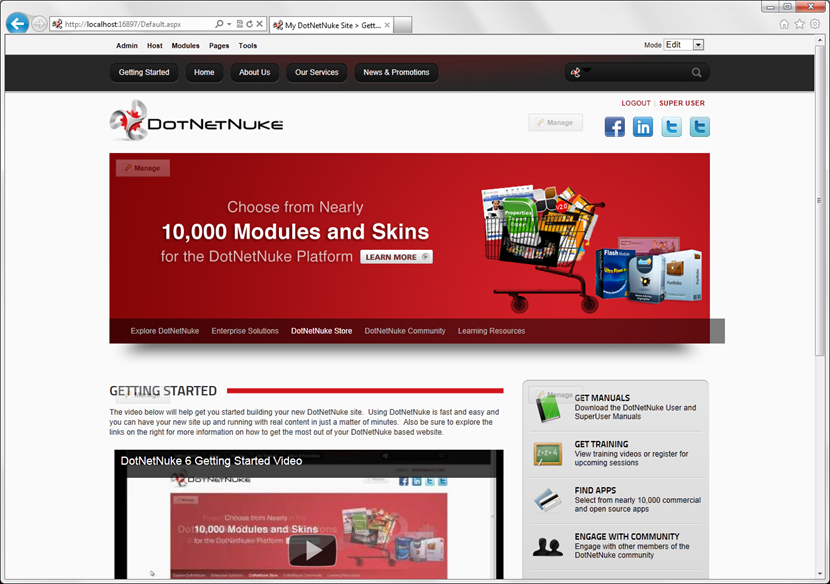
In order to customize our application, we now need to login to our site as an admin. You should have been automatically logged in when your site was created. Once you are logged in as an admin you will have access to more features that allow you to customize your page. A tool bar will be present at the top of the screen.
We can add a new page to our site by adding the required information of name, what template, and where to insert the page to our application.
Mouse over the Pages link at the top and click the “Add” link which will show us a form where we can fill out information about our page.
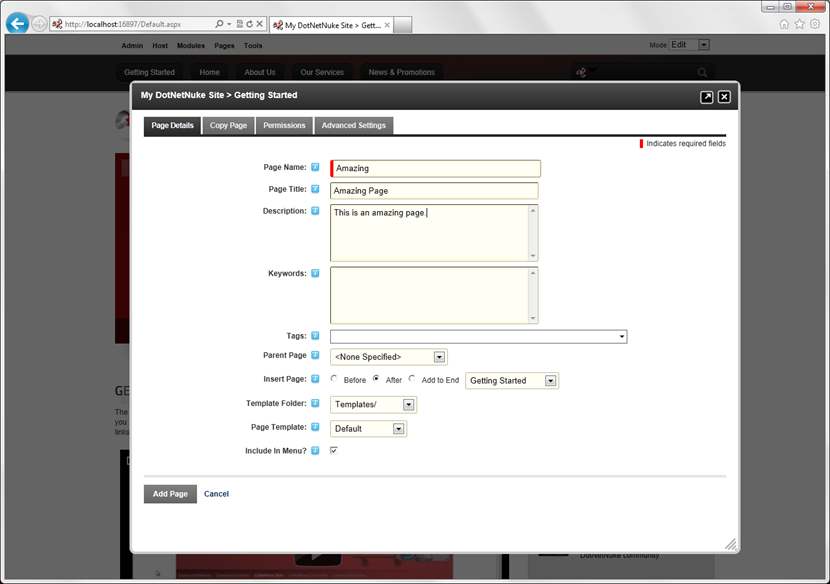
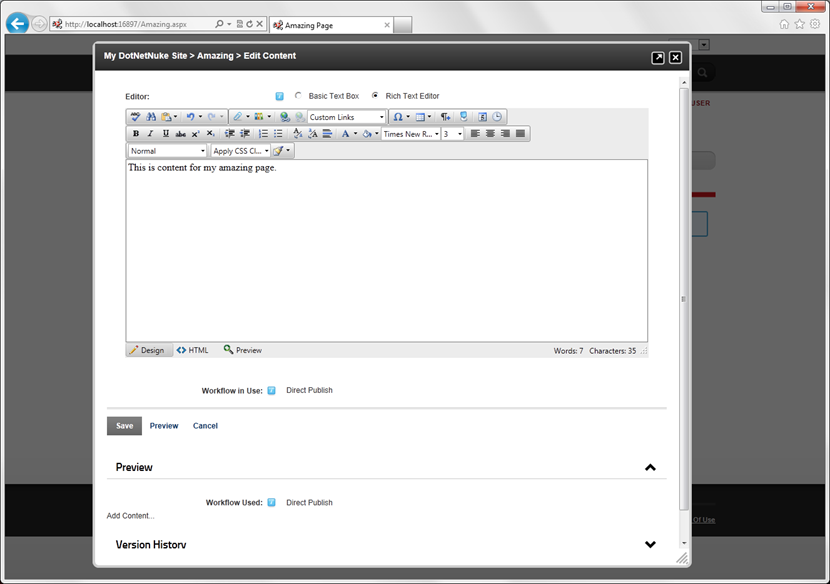
After filling out the information, select “Add Page” so that we are directed to where we can add content to the page. Do so by clicking on the “Edit Content” link. This will cause an edit box to appear where you can add text and images with styling options that code the HTML for you (if you are in the “design” tab).
Once we are done customizing our site, we can publish our application. There are several companies that are offering free WebMatrix hosting. You can find this information under the Publish icon on the ribbon or by clicking the link on your WebMatrix workspace.
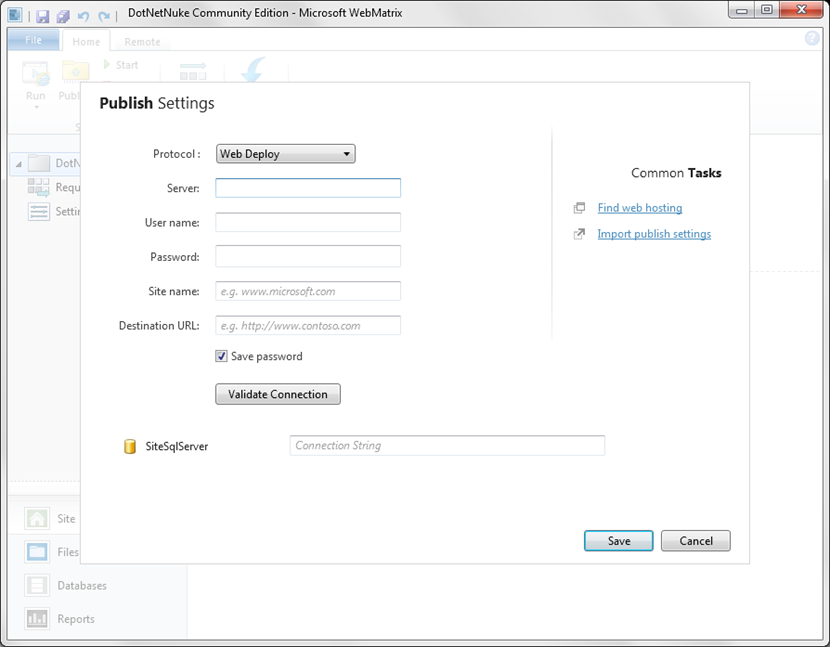
And We created our DotNetNuke application.


DotNetNuke 7.3 Hosting with ASPHostPortal.com :: Multiple View Controls Within A DotNetNuke Module

clock November 6, 2014 05:42 by author Ben

This is a single that threw me for a long time, nevertheless the remedy is actually quite simple. Easy sufficient that i really don't understand why there is not much more documentation on it.

Here’s the scenario: You've got a module with two, or maybe more, achievable interfaces depending on the web page the module is additional to. The view handle features a blank important area and you cannot have copy crucial fields, blank or in any other case. How can you power the non-blank module control to point out around the page with out further coding?

The answer: make use of the module definitions.

Here’s how.

A number of assumptions very first:

You’ve developed a custom made DotNetNuke module.
You have at the very least two module controls in that module.
You've got a DotNetNuke set up to check on as well as the custom module is installed.

Now stick to these actions to show multiple view controls.

  1. Log in as the host user, open the extensions page, and click the edit icon to edit your module

  2. Your module already has a default definition that typically includes a view, edit and settings control.  The setup looks something like the picture below.  (Note: In editing this image I accidentally shortened the source paths.  The format should be DesktopModules/My Custom Module/View.ascx)

  3. Click the “Add Definition” link next the “Select Definition” drop down.

  4. On the new screen fill in the information to create the new definition and click “Create Definition”.  In this case I’m calling it “Definition 2″, but you’ll want to make your definition names descriptive, or whatever meets your naming convention needs.

  5. Now you’ll have a fresh new module definition to fill out just like the default definition.

  6. You can now add new module controls to the definition.  Click the “Add Module Control” link and fill out the form as a new View control by leaving the “Key” field blank.  Fill in the title field, select the source and leave the Type as “View”.


  7. Update the definition and navigate to the web page in which you would like to incorporate the module. Incorporate the module towards the webpage. In the event you had already additional the module you’ll require to delete it and incorporate it once again or else DotNetNuke will not operate the code to add all of the see controls. Once you incorporate the module you ought to see each check out handle you produced a definition for look around the page as being a individual module occasion. In the event you do not, return and verify you accomplished the steps properly.
  8. At this time whatever check out controls you really don't want to look on the web page, merely delete that instance from the module.


About ASPHostPortal.com

We’re a company that works differently to most. Value is what we output and help our customers achieve, not how much money we put in the bank. It’s not because we are altruistic. It’s based on an even simpler principle. "Do good things, and good things will come to you".

Success for us is something that is continually experienced, not something that is reached. For us it is all about the experience – more than the journey. Life is a continual experience. We see the Internet as being an incredible amplifier to the experience of life for all of us. It can help humanity come together to explode in knowledge exploration and discussion. It is continual enlightenment of new ideas, experiences, and passions

Author Link


 photo ahp banner aspnet-01_zps87l92lcl.png

Corporate Address (Location)

ASPHostPortal
170 W 56th Street, Suite 121
New York, NY 10019
United States

Tag cloud

Sign in